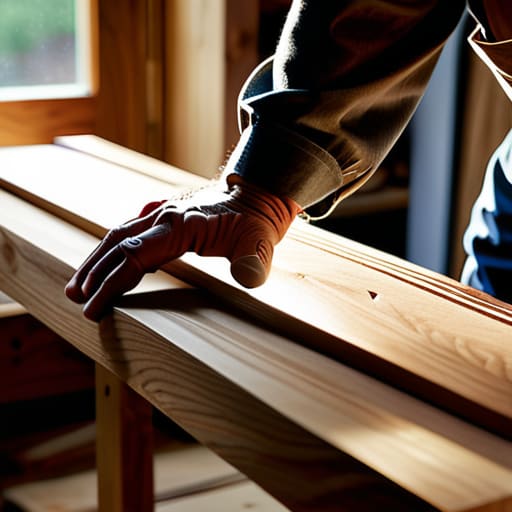
I was staring at my old IKEA shelf last Tuesday, watching the middle board slowly bow under the weight of my technical manuals, and I just lost it. It’s that classic “disposable furniture” trap—it looks fine in a staged photo, but the second you actually try to use it for anything substantial, it starts to fail. If you’re tired of spending money every two years to replace flimsy, particle-board junk, you need to learn how to build a bookshelf that lasts. I grew up in a tiny apartment where every square inch had to earn its keep, and I learned early on that if you don’t build it right the first time, you’re just throwing money down the drain.
In this guide, I’m skipping the aesthetic fluff and getting straight to the structural reality. I’m going to show you exactly which woods are worth your hard-earned cash, how to avoid the structural mistakes that cause sagging, and the specific joinery methods that will keep your books from crashing down. No expensive workshop required—just functional, solid advice that ensures your next project stays standing for a decade, not a season.
Guide Overview
Tools & Supplies
- Circular saw or Table saw for precise wood cutting
- Power drill for pilot holes and assembly
- Kreg Jig for pocket hole joinery
- Orbital sander for smooth finishing
- Clamps to hold pieces during glue drying
- Hardwood boards (Oak or Walnut) 8-10 units
- Wood glue for strong structural bonds 1 bottle
- Wood screws for reinforcement 1 box
- Sandpaper assortment (80, 120, 220 grit) 1 pack
- Wood finish or Polyurethane for protection 1 can
Step-by-Step Instructions
- 1. First, get your materials right because this is where most people fail. Forget that flimsy particle board stuff you see at the big-box stores; it’ll sag under the weight of a few hardcovers and you’ll be back at the store in six months. Go to the lumber yard and grab some solid pine or oak. It’s a bit more of an upfront investment, but it’s the only way to ensure this thing doesn’t turn into a pile of sawdust in a year.
- 2. Measure your space twice, then measure it a third time just to be sure. I’ve learned the hard way that even a quarter-inch error means your shelf won’t fit into that awkward nook in your apartment. Grab a tape measure, a pencil, and a level. You aren’t just measuring height and width; you need to account for the thickness of the wood itself so your math doesn’t go sideways halfway through the build.
- 3. Time to get cutting. If you don’t own a table saw, don’t panic—most hardware stores will make the primary cuts for you if you bring in your measurements. I prefer to do my own to ensure the edges are exactly where I want them, but if you’re working with a tight budget, use the store’s service. Just make sure your cuts for the vertical side supports are identical, or your whole unit is going to lean like the Tower of Pisa.
- 4. Sanding is the part everyone tries to skip because it’s tedious, but don’t be that person. If you leave the wood rough, you’re going to get splinters every time you grab a book, and the finish will look like garbage. Start with a coarse grit to get rid of any factory imperfections and work your way up to a fine grit until the surface feels smooth as glass. It’s a mindless task, so throw on a podcast and just get it done.
- 5. Now, we assemble. I’m a big fan of using wood glue combined with pocket hole screws. The glue creates a bond that’s actually stronger than the wood itself once it cures, and the screws act as your temporary clamps while everything dries. Don’t just slap some nails in and call it a day; if you want this to survive a move to a new apartment, you need structural integrity.
- 6. Apply a finish that actually protects the wood. Since I tend to keep my workspace a bit cluttered with tools and tech, I like a matte polyurethane. It seals the wood against moisture and stains without making it look like it’s covered in cheap plastic. Use a high-quality brush and do thin, even coats rather than one thick, gloopy layer that’ll leave drip marks everywhere.
- 7. Finally, anchor it to the wall. This is non-negotiable, especially if you live in an older building with uneven floors or if you have pets. Use an L-bracket to secure the top of the bookshelf to a wall stud. It’s a small extra step that prevents a total disaster if someone bumps into it or if you decide to load it up with heavy tech manuals.
Hardwood vs Softwood Choosing the Best Wood for Heavy Books
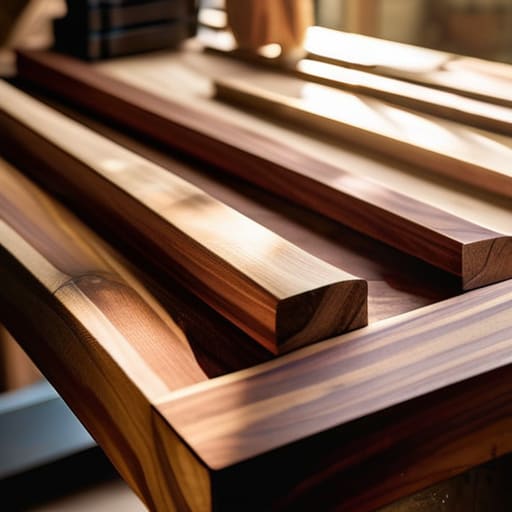
Look, I’ve seen too many people buy a cheap pine shelf only to watch it bow under the weight of a single hardcover series within six months. If you’re serious about preventing shelf sagging, you need to understand the difference between hardwood and softwood for furniture. Softwoods like pine or cedar are easy to work with and cheap, which is great for your wallet initially, but they lack the density needed for long-term stability. If you’re planning on loading this thing with heavy textbooks or thick art books, softwoods are going to give up the ghost pretty quickly.
For a project that actually holds up, you want to go with hardwoods like oak, maple, or walnut. They are denser, much more resilient, and significantly better at maintaining the structural integrity of bookshelves over time. Yes, they’ll cost more upfront, and they’re a bit more of a pain to sand and finish, but it’s a one-and-done investment. I’d rather spend a little extra now than have to rebuild the whole damn thing next year because the wood decided to warp.
Preventing Shelf Sagging Through Better Structural Integrity
Look, I’ve seen too many “aesthetic” bookshelves turn into literal banana peels after six months because someone ignored physics. If you’re planning on loading this thing with heavy hardcovers or tech manuals, you can’t just rely on a few screws and hope for the best. The real secret to preventing shelf sagging isn’t just the type of wood you pick; it’s about how you support the span. If your shelves are wider than 30 inches, you’re asking for trouble unless you add a solid center support or a thick front edge (a “nosing”) to stiffen things up.
Don’t skimp on the connection points, either. Instead of just using basic butt joints that rely entirely on glue and a couple of nails, look into durable joinery techniques like pocket holes or, if you’re feeling ambitious, dado joints. Cutting a groove into the side panels for the shelf to sit in makes a massive difference in the overall structural integrity of bookshelves. It turns the unit from a collection of boards into a single, rigid frame. If you build it flimsy, you’ll be rebuilding it by next year—and I don’t have the time or the budget for that.
5 Ways to Stop Your Bookshelf From Turning Into a Wobbly Mess
- Stop relying on just nails. If you want this thing to stay upright when you’re shoving heavy hardcovers onto it, use wood screws and pre-drill your holes. Nails pull out over time, and trust me, you don’t want your collection sliding to the floor because you tried to save five bucks on hardware.
- Don’t skip the backing. It sounds extra, but nailing a thin sheet of plywood to the back of the frame is what actually prevents the whole unit from leaning or collapsing sideways. It’s the cheapest way to add massive structural stability.
- Level it or lose it. If your floor is uneven—and let’s be real, most apartment floors are—don’t just shove the shelf into a corner and hope for the best. Use some shims under the base so the weight distributes evenly. If it’s tilted, the stress will eventually crack your joints.
- Mind your span. I know it looks cool to have one long, wide shelf, but physics doesn’t care about your aesthetic. Keep your shelf spans under 30 inches if you aren’t using a center support, otherwise, you’re basically building a slow-motion catapult for your books.
- Sand it properly before you finish. It’s tempting to just slap some stain on and call it a day, but if you don’t sand between coats, the wood will feel like sandpaper and look cheap. A smooth finish isn’t just for looks; it protects the wood from moisture and wear.
Don't Settle for Junk
Look, at the end of the day, building a bookshelf that doesn’t turn into a sad, bowing mess of sawdust is all about the fundamentals. You’ve got to pick the right wood—skip the cheap particle board if you actually want this to last more than a season—and you have to prioritize structural integrity over how “aesthetic” the wood grain looks in a photo. Whether it’s reinforcing your joints or choosing a solid hardwood that can actually handle the weight of your heavy tech manuals or hardcovers, the goal is functional durability. If you cut corners on the materials or the support structure now, you’re just going to end up spending more money to replace it in a year. Don’t let your hard work go to waste by being lazy with the prep work.
I know it feels a lot more intimidating to start a DIY project when you aren’t staring at a perfect Pinterest board, but that’s exactly why you should do it. There is something incredibly satisfying about looking at a piece of furniture and knowing it was built to actually work for your specific space and your specific budget. You don’t need a massive workshop or a professional carpenter’s license; you just need the right mindset and a refusal to settle for low-quality garbage. Stop waiting for the “perfect” time to start and just build something that lasts.
Once you’ve got your wood selected and your structural plan set, the next hurdle is usually the sheer logistics of getting everything done without losing your mind. If you’re feeling overwhelmed by the sheer amount of planning involved, I usually find that having a solid community or a reliable way to connect with others who have similar interests helps keep the momentum going. It’s a lot easier to tackle a massive DIY project when you aren’t just stuck in your own head, and sometimes meeting people in UK who share your drive for building things can provide that extra bit of practical motivation you need to actually finish what you started. Honestly, don’t try to be a martyr and do everything in total isolation; even the best projects benefit from a little outside perspective.
