You’re probably staring at your heating bill thinking you need a whole new HVAC system or a massive renovation to stop feeling that icy draft, but let me stop you right there: that’s total nonsense. Most of the time, you aren’t losing heat because your house is “broken,” you’re losing it because you’re neglecting the basics. I spent my childhood in a tiny, drafty apartment where I’d wrap myself in three blankets just to sleep, and I learned early on that weatherstripping a door is the single most effective way to stop literally throwing your hard-earned cash out the window. It’s not about aesthetics or making your entryway look like a Pinterest board; it’s about functional survival and keeping your utility costs from skyrocketing.
I’m not going to waste your time with expensive, over-engineered kits that require a contractor to install. In this guide, I’m breaking down exactly how to identify where the air is leaking and which cheap, reliable materials actually work for a real budget. We’re going to skip the fluff and get straight to the no-nonsense steps for getting the job done right the first time. Let’s get to work.
Guide Overview
Tools & Supplies
- Measuring tape to determine door perimeter and gap width
- Scissors or utility knife for trimming materials
- Screwdriver if using screw-on door sweeps
- Weatherstripping roll or strips (adhesive or tension-based)
- Door sweep (if installing at the bottom)
- Cleaning solution/alcohol wipes to prep the surface
Step-by-Step Instructions
- 1. First things first, you need to figure out what you’re actually dealing with. Grab a flashlight and a piece of paper, then run your hand around the door frame while the lights are off. If you feel a draft, mark that spot with a little piece of painter’s tape. You don’t want to just buy random foam and hope for the best; you need to know if you’re looking for a door sweep, adhesive foam, or those rubber tension seals.
- 2. Once you know where the leaks are, grab a screwdriver and some heavy-duty cleaner. You can’t just slap new sealant over years of accumulated dust and grime, or it’ll peel off in a week. Scrub the frame until it’s actually clean. If you’re using adhesive strips, this part is non-negotiable if you want them to actually stay put.
- 3. Now, go to the hardware store—or just check your junk drawer—and get your materials. If you’re on a tight budget, look for the basic rubber weatherstripping rather than the fancy “designer” versions. They do the exact same thing. Measure the height and width of your door frame twice before you leave the aisle. I’ve learned the hard way that guessing measurements is just a fast track to a wasted trip back to the store.
- 4. If you’re using the adhesive kind, peel the backing off slowly. Don’t try to do the whole door in one go like you’re applying a sticker to a laptop. Work in small sections, maybe six inches at a time, and press it down firmly. You want to make sure there are no air pockets trapped underneath, or the draft will just find its way right through the gaps.
- 5. For the bottom of the door, you’re likely looking at a door sweep. If yours is screwed in, line it up so it just barely touches the threshold. You want a seal, not a barricade. If it’s too tight, you’re going to be fighting the door every time you want to walk into your own room, and that’s not worth the hassle.
- 6. Once everything is installed, do the “light test.” Turn off the lights in your hallway and look at the door from inside the room. If you see slivers of light peeking through the edges, your seal isn’t tight enough. Adjust the strips or add another layer until it’s dark. It’s a simple fix that saves you a ton on your utility bill.
Choosing Effective Types of Door Weatherstripping Materials
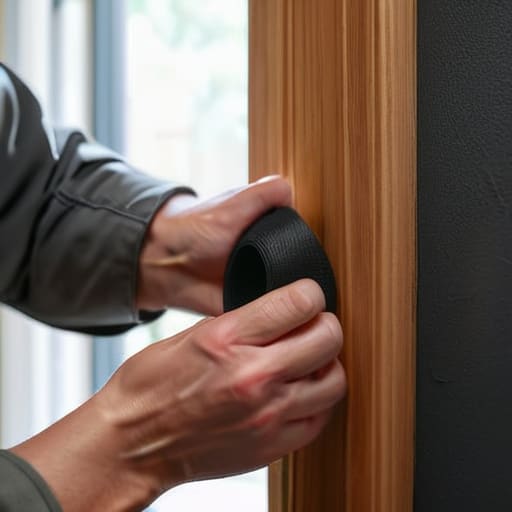
Don’t get sucked into the trap of buying whatever looks the prettiest on a store shelf. When you’re looking at the different types of door weatherstripping materials, you need to match the tool to the specific problem. If you’ve got huge gaps around the sides of your door, go with a foam tape—it’s cheap, easy to stick on, and works great for preventing air leaks around doors that aren’t perfectly square. If your door is heavy or you’re dealing with a high-traffic entrance, skip the flimsy foam and grab some silicone or rubber bulb seals. They actually hold up over time instead of flattening out and becoming useless after a month.
If the draft is coming from the very bottom, stop messing around with side seals and focus on a proper door bottom seal installation. I usually recommend a heavy-duty sweep or a U-shaped tension seal. It’s one of those small energy efficient home upgrades that actually pays for itself by the first month of winter. Just a heads-up: before you glue or screw anything down, wipe the surface clean with some isopropyl alcohol. If you don’t, that expensive seal is going to peel off in a week, and you’ll be right back to wasting money on your heating bill.
Mastering Door Jamb Sealing Techniques for Real Results
Look, you can buy the most expensive foam strips on the market, but if your application is sloppy, you’re basically just taping trash to your door. When I’m working on door jamb sealing techniques, I don’t just slap it on and hope for the best. You need to check the alignment first. If your door is sagging or the frame is slightly warped—which happens more often than people realize—the seal won’t compress evenly. I always use a flashlight to check for light bleeding through the cracks before I commit to the adhesive. If you see light, you’ve got a gap, and that gap is exactly where your money is escaping.
Don’t forget about the bottom of the door, either. A lot of people obsess over the sides but completely ignore the gap at the floor. A proper door bottom seal installation is a total game-changer for preventing air leaks around doors that sit low to the ground. I usually opt for a heavy-duty sweep because it actually stands up to being kicked or stepped on. It’s one of those small, unglamorous steps that makes a massive difference in how much your HVAC system has to work. Keep it tight, keep it even, and stop letting your comfort drift out into the hallway.
5 Pro-Tips to Stop Your Money from Leaking Through the Cracks
- Don’t just eyeball it. Grab a flashlight, turn off the lights inside, and have someone shine it from the outside. If you see light bleeding through the edges, you’ve got a gap that needs fixing.
- Clean your door frame like your life depends on it. If you slap new adhesive onto a layer of old dust and grime, it’s going to peel off in a week, and you’ll be right back where you started.
- Check the threshold, not just the sides. A lot of people obsess over the jambs but forget that the bottom of the door is usually where the biggest drafts live. If your door sweep is worn down, swap it out.
- Test the “Paper Trick.” Close your door on a piece of paper; if you can pull it out easily without any resistance, your weatherstripping isn’t compressed enough. It needs to be a snug fit, not a suggestion.
- Stop buying the cheapest foam rolls at the big-box stores for exterior doors. They degrade in the sun and wind within months. Spend the extra five bucks on something rated for outdoor use so you aren’t doing this job again next season.
The TL;DR: Stop the Drafts and Save Your Cash
Don’t just buy the first roll of foam you see at the hardware store; match the material to the specific gap you’re trying to kill so you aren’t wasting money on stuff that won’t actually seal.
Precision matters more than speed—if you don’t clean that door jamb properly before sticking anything to it, your hard work is going to peel off in a week and you’ll be right back where you started.
Focus on the perimeter first, but don’t forget the bottom of the door; a drafty threshold is usually the biggest culprit eating up your heating bill.
Don't Leave Your Money in the Draft
Look, we’ve covered a lot, but let’s get back to the basics so you don’t forget: pick the right material for the job, clean that surface like your life depends on it, and make sure those seals actually hit the frame without being crushed. It’s not about making your entryway look like something out of a luxury home magazine; it’s about ensuring that when the temperature drops, your hard-earned cash isn’t literally leaking through the cracks of your front door. If you skipped the cleaning step or tried to eyeball the alignment, go back and fix it now. A half-assed job is just a waste of a Saturday and a waste of the materials you just bought. Do it right the first time so you can actually stop thinking about it.
At the end of the day, home maintenance isn’t supposed to be some aesthetic hobby for people with endless free time. It’s about taking control of your environment and making sure your space actually works for you. It might feel like a small, annoying task, but these little wins—the ones that actually lower your utility bill or keep your apartment from feeling like a walk-in freezer—are what really matter. Stop waiting for a professional or a “perfect time” to fix things. Grab your multi-tool, get it done, and get back to your life.
Frequently Asked Questions
How do I know if the draft is actually coming from the door itself or if it's just a gap in the floorboards?
Don’t guess and waste money on the wrong fix. Grab a stick of incense or a candle you don’t mind burning and light it. Walk slowly around the door frame on a windy day. If the smoke dances or gets sucked toward the door, you’ve found your culprit. If the smoke stays steady but you still feel a chill, stop looking at the door and start checking those floorboards.
Is it worth buying the expensive silicone strips, or can I just use the cheap foam stuff and call it a day?
Look, if you’re on a super tight budget, the cheap foam works for a quick fix, but it’s basically a band-aid. It compresses, tears, and loses its shape in a few months, meaning you’ll be doing this all over again. If you want to actually set it and forget it, spring to the silicone. It’s more upfront cash, but it lasts way longer and actually keeps the drafts out. Buy once, cry once.
What happens if I mess up the alignment—do I have to scrape all the old adhesive off and start from scratch?
Look, don’t panic. You haven’t ruined your life, but yeah, if it’s crooked, it’s probably not sealing right. If you just slap more on top, you’re creating a gap that’ll let the cold right in. If the adhesive is still fresh, try to peel it back carefully. If it’s already set, you’re gonna have to grab a scraper or some Goo Gone and clear that surface. It’s a pain, but doing it once right beats doing it twice wrong.
Can I use this same stuff on my windows, or am I going to end up with a sticky, unsealable mess?
Short answer: Don’t do it. If you try to slap heavy-duty door stripping on a window, you’re basically gluing them shut. It’s a nightmare to open and looks like a total disaster. Windows need something slimmer, like V-seal or adhesive foam tape, so they can actually slide or crank without sticking. Stick to the right tool for the job—don’t waste your time (or your money) trying to make one product do everything.
