I was staring at a massive, half-empty gallon of “eggshell white” smeared across my floorboards when I realized I’d completely botched my first attempt at DIY. I had followed every single “aesthetic” tutorial on social media, buying expensive drop cloths and designer-brand brushes, only to end up with streaks that looked like a toddler had gone to town with a sponge. The truth about how to paint a room is that most of those polished videos are lying to you; they make it look like a meditative, seamless process when, in reality, it’s just messy, repetitive work that requires more prep than actual painting.
I’m not going to tell you to buy a specialized kit or spend a week’s rent on premium tools just to change a wall color. In this guide, I’m stripping away the fluff and showing you the actual, gritty way to get it done without breaking your budget or your sanity. We’re going to focus on the essential tools that actually matter, how to prep your space so you aren’t cleaning up spills for a month, and the specific shortcuts that save you time. Let’s get to work.
Guide Overview
Tools & Supplies
- Paint roller and tray for large surfaces
- Angled sash brush for edges and corners
- Painter's tape for clean lines
- Drop cloths to protect flooring
- Interior paint (1-2 gallons depending on room size)
- Painter's tape (1-2 rolls)
- Sandpaper (fine grit for smoothing walls)
- Spackle (small tub for patching holes)
Step-by-Step Instructions
- 1. First, clear the deck. You don’t need to move every single piece of furniture out of the room—that’s a waste of time—but you have to get everything away from the walls. Push your heavy stuff to the center of the room and cover it with old sheets or cheap plastic drop cloths. If you don’t, you’re going to spend your entire weekend scrubbing paint splatters out of your rug, and trust me, that’s a losing battle.
- 2. Prep the surfaces because this is where people usually mess up. Take a damp cloth and wipe down the walls to get rid of dust and cobwebs; if the wall is dirty, the paint won’t stick, and you’ll be peeling it off in six months. Grab a screwdriver from my multi-tool or just a standard one and remove all the outlet covers and switch plates. Taping around them is a massive headache you don’t need.
- 3. Get your painter’s tape out and be precise. Run the tape along the baseboards, the ceiling line, and around any window frames. The trick is to press the edge down hard with your fingernail or a putty knife so the paint doesn’t bleed underneath. If you’re lazy here, you’ll end up with jagged, messy lines that make the whole room look amateur.
- 4. Patch the holes. If you’ve got nail holes or scuffs from moving furniture, grab a small tub of spackle and a cheap putty knife. Fill the gaps, let it dry, and then sand it smooth with a fine-grit sandpaper. If you skip this, those little divots will show up like bright neon signs once you put a fresh coat of paint on.
- 5. Start with the “cut-in” phase. Don’t just start rolling the big walls immediately. Take a medium-sized angled brush and paint a border around the edges of the room—the corners, the ceiling line, and around the trim. This is the tedious part, but it’s the only way to ensure you don’t end up with unpainted streaks hiding in the corners.
- 6. Now, grab your roller and get to work. Don’t try to be fancy; just work in small sections, about a three-foot area at a time. Use a “W” or an “M” motion to distribute the paint, then fill in the gaps. It’s much better to do two thin coats than one thick, gloopy layer that drips and looks uneven when it dries.
- 7. Finally, pull the tape off while the paint is still slightly tacky. If you wait until the paint is bone-dry, the tape might actually pull chunks of your new finish right off the wall. Once the tape is gone and everything is dry, screw your outlet covers back on and you’re done. It’s not a Pinterest-perfect showroom, but it’s functional and looks great, which is all that matters.
An Essential Painting Supplies Checklist That Actually Matters
Look, I’ve seen way too many people head to the hardware store and come back with a cart full of “premium” gadgets they’ll never use again. You don’t need a professional-grade sprayer to refresh a bedroom. My essential painting supplies checklist is pretty stripped back: a decent angled brush for the edges, a medium nap roller, a sturdy tray, and enough painter’s tape to actually do the job right. If you’re trying to save money, don’t skimp on the tape; cheap stuff tears your paint off when you peel it, and that’s just more work you don’t need.
When it comes to the actual liquid in the can, stop obsessing over the most expensive designer brands. You just need the best paint for interior walls that offers good coverage so you aren’t doing five coats. While you’re at it, don’t ignore the prep. I know it’s a pain, but knowing how to prep walls for painting—like cleaning off the dust and filling those tiny cracks—is the only way to keep the finish from looking like a total disaster. Finally, please, for the love of everything, spend the extra five bucks on heavy-duty drop cloths. Protecting furniture while painting is way easier than trying to scrub dried latex out of your favorite rug later.
How to Prep Walls for Painting Without Wasting Hours
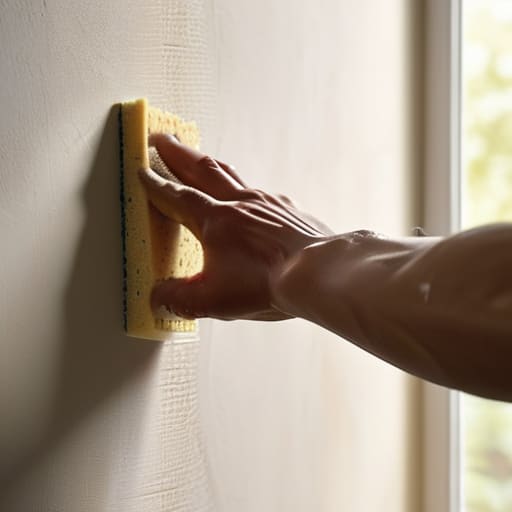
Look, I know the temptation to just grab a brush and start slapping color onto the walls, but if you skip the prep, you’re basically asking for a headache. I learned this the hard way in my first apartment when I tried to paint over a dusty, greasy wall and the whole thing started peeling like a bad sunburn. When learning how to prep walls for painting, the secret isn’t some expensive chemical; it’s just a bucket of warm water, a drop of dish soap, and a sponge. You need to get the grime off so the paint actually sticks. If there are tiny holes from old command strips or nail holes, don’t go buying a massive tub of spackle. Just grab a small container of lightweight filler, dab it in, and wipe it flat.
While you’re at it, don’t ignore the floor. I’ve seen too many people spend hours on the walls only to spend the next three days scrubbing white speckles out of their carpet. Instead of just throwing a thin sheet over everything, focus on protecting furniture while painting by using heavy-duty drop cloths or even old bedsheets you were going to toss anyway. It’s about layering your defense—move the heavy stuff to the center of the room and cover it well. If you do the grunt work now, you won’t be redoing the entire job next weekend because of a preventable mess.
5 Mistakes That’ll Make You Regret Your DIY Paint Job
- Stop buying the cheapest paint you can find at the big-box store just to save five bucks. It’s thinner, requires more coats, and you’ll end up spending more time (and money on extra cans) trying to get even coverage. Buy the mid-range stuff that actually covers in two passes.
- Don’t skip the primer just because the can says “Paint + Primer in one.” That’s marketing fluff. If you’re painting over a dark color with something light, or if you’re working on a patch job, use a real primer. It’s the only way to make sure the color actually looks the way it did on the swatch.
- Put your tape on before you start painting, and don’t be afraid to run a damp rag or even a bit of paint along the edge of the tape first. This seals the line so the new color doesn’t bleed underneath. Trust me, spending ten minutes doing this is way better than spending two hours trying to scrape dried paint off your baseboards.
- If you’re working alone, don’t try to be a hero and paint the whole room in one sitting. Work in manageable sections and keep your edges “wet” if you can. If you let the edges dry completely before doing the middle, you’re going to end up with those ugly, visible lines that make the whole room look amateur.
- Clean your brushes immediately. I know, it sounds like a chore, but if you leave a $15 brush to dry with paint in it, you’re just throwing money in the trash. Wrap them tightly in plastic wrap or a grocery bag if you’re taking a break, but the second you’re done for the day, get that paint off.
The Bottom Line: Don't Overthink It, Just Do It Right
Stop obsessing over the perfect shade of “eggshell” in a catalog; buy a small sample, test it on your actual wall under your own lighting, and if it looks like garbage, return it before you commit to the whole room.
Most of your mistakes will come from being lazy with the prep work, so if you skip the sanding or the taping, you’re just going to end up spending twice as much time (and money) fixing a messy finish later.
You don’t need a professional-grade setup to get a decent result, just focus on the basics: good quality tape, a decent roller that won’t shed fuzz everywhere, and enough patience to let the first coat dry completely before you even think about touching it again.
Don't Overthink the Finish Line
Look, at the end of the day, you’ve done the hard part. You didn’t fall for the trap of buying every expensive gadget at the hardware store, and you didn’t skip the prep work that actually makes the paint stick. You’ve cleared the clutter, patched the holes, and laid down the tape. If there’s a tiny drip or a spot where the edge isn’t perfectly surgical, don’t sweat it. Unless you’re planning on selling the place tomorrow, a slightly imperfect wall is a hell of a lot better than a half-finished project that’s been sitting in the corner for three weeks. Just clean your brushes, seal your paint cans tight so they don’t dry out, and call it a win.
I know it feels like a lot of effort for just a change of color, but there is something incredibly satisfying about looking around a room and knowing you didn’t have to drain your savings to make it look better. You took a space that felt stale and you fixed it with your own two hands and a bit of grit. That’s the goal: making your environment work for you without letting the “aesthetic” side of things drain your bank account. Now, grab a drink, sit in your newly painted space, and enjoy the results of your labor. You earned it.
Frequently Asked Questions
Do I really need to buy a separate primer, or can I just use a high-quality paint and save the cash?
Look, I get it—every extra can of paint feels like throwing money into a void. But here’s the reality: if you’re painting over a dark color or bare drywall, skipping primer is a trap. You’ll end up buying twice as much expensive paint just to get even coverage. Save your cash by using a primer if the surface is problematic. If you’re just refreshing a similar color on a clean wall? You can probably skip it.
How do I figure out exactly how much paint to buy without ending up with three extra gallons gathering dust in my closet?
Stop guessing and stop overbuying. Grab a tape measure and measure the length and width of your walls, multiply them to get the total square footage, and then subtract your windows and doors. Most paint cans cover about 350-400 square feet per gallon. Do the math for two coats—because one coat is a lie—and buy exactly that. If you’re left with a tiny bit, keep it for touch-ups; if you have a whole gallon left, you failed the math.
Is there a way to paint without moving every single piece of furniture out of the room, or am I stuck doing that?
Look, if you have a tiny apartment like I did growing up, moving everything out is a nightmare you don’t need. You don’t have to clear the floor. Just drag your heavy stuff to the center of the room and cover it with old sheets or cheap plastic drop cloths. For the smaller items, grab some bins, toss them in a closet, and get them out of the splash zone. Focus on protecting, not relocating.
How do I stop the smell from taking over my entire apartment for the next three days?
Look, if you just finished painting, don’t expect that “new room” smell to vanish overnight. To stop it from suffocating your whole place, crank the windows in that room—even if it’s freezing—and create a cross-breeze with a box fan facing out the window to suck the fumes away. Also, ditch the expensive scented candles; they just mix with the chemicals and make it worse. Stick to bowls of white vinegar or activated charcoal to actually absorb the odor.
