I was staring at a pile of heavy textbooks and half-empty herb pots on my floor, realizing my tiny apartment was officially out of usable surface area, when I realized I didn’t need a carpenter—I just needed to figure out how to install a shelf without losing my mind or my security deposit. Most DIY videos make it look like some aesthetic, slow-motion dream with perfect lighting and expensive custom wood, but let’s be real: most of us are working with cheap particle board and drywall that feels like it might crumble if you look at it wrong. You don’t need a professional workshop to reclaim your space; you just need to stop overthinking the aesthetic and start focusing on the physics of what actually holds weight.
I’m not going to waste your time with decorative fluff or suggesting you buy a $500 toolset you’ll only use once. Instead, I’m giving you the actual, gritty blueprint for getting things off your floor and onto your walls using the basic gear you probably already have in a junk drawer. We’re going to cover finding the studs, choosing the right anchors so your stuff doesn’t end up in a pile of broken glass, and how to level things without a degree in engineering. Let’s get this done so you can actually use your room.
Guide Overview
Tools & Supplies
- Drill/Driver for making holes and driving screws
- Level to ensure the shelf is straight
- Stud Finder to locate wall supports
- Pencil for marking measurements
- Shelf and brackets 1 set
- Wall anchors and screws 1 pack
Step-by-Step Instructions
- 1. First things first, stop looking at those Pinterest boards and go grab your gear. You don’t need a professional toolkit, but you definitely need a drill, a level (or a level app on your phone if you’re being cheap), a stud finder, a pencil, and some decent screws. If you’re using drywall anchors because you missed the stud, make sure they aren’t the cheap plastic ones that snap like twigs—get the heavy-duty screw-in kind instead.
- 2. Now, pull out that stud finder and scan your wall. I’m telling you right now, if you just screw into plain drywall without hitting a stud, that shelf is going to end up in a pile on your floor along with whatever you were trying to store. Once you find the wood behind the wall, mark it with your pencil. If you can’t find a stud, you’ll have to rely on anchors, but aim for the most solid spot you can find.
- 3. Hold your shelf up to the wall (or your brackets) and use your level to make sure it isn’t crooked. There is nothing more annoying than a shelf that looks like it’s sliding off to the left. Once it’s perfectly straight, use your pencil to mark the exact holes where the screws need to go. Double-check the level one last time before you start drilling; you don’t want to have to rework the whole thing because you were rushing.
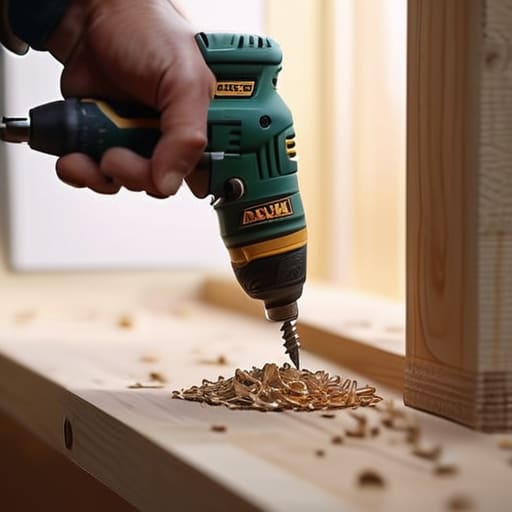
- 4. Grab your drill and start making your pilot holes. If you’re going into a stud, keep the bit small enough so you don’t split the wood, but large enough to guide the screw. If you’re using anchors in drywall, drill the hole to the specific size the package recommends. Don’t eyeball it—if the hole is too big, the anchor won’t grip, and you’re back to square one.
- 5. Line up your brackets or the shelf itself and start driving those screws in. If you’re using a power drill, don’t go full throttle immediately or you’ll strip the screw head and ruin your afternoon. Use controlled, steady pressure until everything is tight. If it feels like the screw is getting harder to turn, stop and check if you’ve hit something you shouldn’t have.
- 6. Give the shelf a firm shake. I know it sounds aggressive, but I do this every single time. You need to know if that thing is actually structurally sound before you go placing your heavy tech gear or massive plant pots on it. If it wobbles, tighten the screws or check if your anchors are seated properly. If it’s solid, you’re done—now go actually use the space you just created.
Essential Tools for Shelf Installation Without the Bloat
Look, you don’t need a professional workshop or a massive budget to get this done, but you do need to stop guessing. If you try to wing it with just a screwdriver and a prayer, you’re going to end up with a pile of broken ceramic on your floor. The absolute bare minimum you need is a decent drill, a level, and a pencil. I used to think I could just hammer things into the wall, but trust me, knowing the difference between drilling into drywall vs studs is the only thing standing between a functional shelf and a massive hole in your apartment wall.
If you’re planning on anything more than just displaying a single succulent, you need to invest in a solid wall stud finder. Don’t bother with the super expensive electronic ones if you’re on a budget; even a basic magnetic one works if you know what you’re looking for. Once you find that wood, that’s where you’ll want to focus on heavy duty shelf mounting to ensure your stuff actually stays put. Also, don’t get distracted by all the different shelf bracket types at the hardware store—just pick the ones that match your weight load and move on. Keep it simple, keep it sturdy, and stop overthinking the aesthetics.
Choosing Your Hardware Shelf Bracket Types That Actually Hold Weight
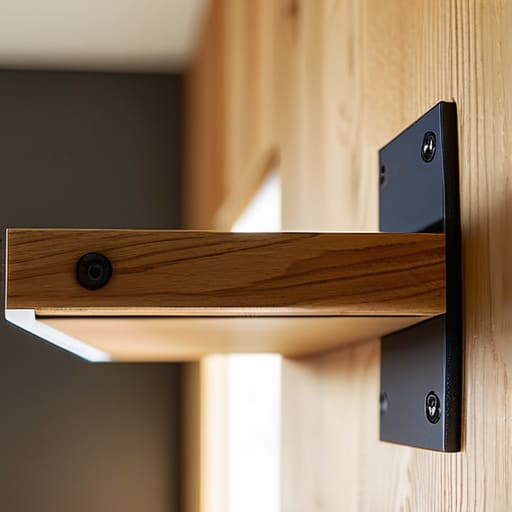
Look, don’t let the hardware aisle intimidate you. Most people walk in, grab the first decorative thing they see, and then wonder why their books are currently a pile on the floor. If you’re planning on anything heavier than a single succulent, you need to understand different shelf bracket types before you even pick up a screwdriver. L-brackets are your best friend for sheer strength, especially if you’re doing some serious heavy duty shelf mounting. They’re ugly? Maybe. But they won’t buckle under the weight of your tech gear or heavy hardcovers.
If you’re aiming for that clean, seamless look, you’ll probably be looking at hidden brackets for a floating shelf. Just a heads-up: these are much more finicky. You’ll spend way more time leveling a floating shelf than you would with a standard bracket, and there is zero room for error.
The most important thing I can tell you, though, is that the bracket is only as good as what it’s attached to. There is a massive difference between drilling into drywall vs studs. If you aren’t hitting a stud, those fancy brackets are just expensive wall decorations waiting to fail. Use a stud finder, find the wood, and anchor into that. If you can’t hit a stud, invest in high-quality toggle bolts—don’t settle for those cheap plastic anchors that crumble the second you apply pressure.
Pro-Tips to Keep Your Shelf from Becoming a Pile of Junk on the Floor
- Stop trusting your eyes. Use a level—even a cheap one—to make sure your shelf isn’t slanted. If it’s off by even a tiny bit, everything you put on it is going to slide toward the floor eventually.
- Find a stud. I don’t care how much “heavy-duty” drywall anchor you bought; if you aren’t hitting a wooden stud, that shelf is a ticking time bomb. Use a stud finder or just knock on the wall until you hear that solid thud.
- Account for the weight before you even buy the shelf. If you’re planning to stack heavy textbooks or kitchen appliances, don’t go for those thin, aesthetic floating shelves you see on Pinterest. They’ll buckle. Plan for the load, not the look.
- Don’t skip the pilot hole. If you try to force a screw directly into wood or a stud without drilling a small hole first, you’re going to crack the material or strip the screw. Take the extra thirty seconds to drill; it saves you a massive headache later.
- Keep your hardware organized while you work. There is nothing more frustrating than being halfway through an install and realizing you dropped a tiny screw into a dark corner or under the baseboard. Grab a small magnetic tray or even just an old pill bottle to hold your bits and screws.
The Bottom Line: Stop Overthinking and Start Mounting
Don’t waste money on “aesthetic” hardware that can’t handle a single heavy book; always prioritize the weight rating of your brackets over how they look on Pinterest.
Finding a stud is non-negotiable if you actually want your stuff to stay off the floor—if you skip this, you’re just asking for a hole in your drywall and a broken shelf.
Keep your toolkit lean and functional; you don’t need a professional carpenter’s setup, just the right drill bit and a level so your life doesn’t look crooked.
Stop Overthinking and Just Mount It
Look, at the end of the day, installing a shelf isn’t about having a professional-grade workshop or a Pinterest-perfect tool kit. It’s about knowing which bracket won’t buckle under your books and making sure you actually hit a stud so your stuff doesn’t end up in a pile on the floor. We covered the essentials: get the right hardware, grab a drill, and don’t skip the level. If you’ve got the right tools and you’ve checked your weight limits, you’ve already done the hard part. Don’t let the fear of a crooked line stop you; functionality beats perfection every single time.
I know it feels like just another chore on an endless to-do list, but there is something incredibly satisfying about reclaiming your space with your own two hands. You don’t need a contractor to make your apartment feel like yours; you just need a little bit of grit and a screwdriver. Stop waiting for the “perfect” moment or the perfect aesthetic to fix up your living situation. Just grab your multi-tool, get to work, and build something that works for you. You’ve got this.
Frequently Asked Questions
I'm renting—how do I hang these without losing my security deposit?
Look, I get it. I grew up in a tiny apartment where every scratch on the wall felt like a personal attack on my bank account. If you’re renting, don’t go wild with massive floating shelves. Stick to smaller brackets and use drywall anchors—they’re lifesavers. When it’s time to move, just patch the holes with a $5 tub of spackle and a putty knife. It’s way cheaper than a security deposit deduction.
What do I do if I can't find a stud where I actually want the shelf?
Look, I’ve been there—you finally find the perfect spot for your tech gear, but the wall is just empty drywall. Don’t panic and don’t just shove a screw into the void; that’s how you end up with a hole in your wall and a shelf on the floor. Grab some heavy-duty toggle bolts. They expand behind the drywall to grip it tight. It’s not as “clean” as hitting a stud, but it works.
How much weight can these things actually hold before they rip out of the drywall?
Look, if you’re just screwing into drywall with those cheap plastic anchors, don’t even bother putting a heavy book on it. You’ll rip a hole in your wall in five seconds. If you want to actually hold weight, find a stud. A single screw into a stud can handle way more than any anchor. If you can’t hit a stud, use heavy-duty toggle bolts. Forget the “up to 20lbs” labels—if it isn’t anchored solid, it’s a trap.
My walls are basically made of sand; is there a way to make this stable?
Ugh, the “sand wall” struggle is real. If you’re dealing with crumbly drywall or old plaster, standard anchors are useless—they’ll just pull right out and leave a crater. Stop trying to force it. You need heavy-duty toggle bolts. They expand behind the wall to distribute the weight, so they actually grip instead of just spinning in the dust. It’s not the prettiest fix, but it’s the only one that won’t end in a broken shelf.
